Tech Tip: Creating domain-specific 2D map views in VR-Forces
By controlling layers within your terrain definition, you can have 2D map views that are specific to each simulation domain. Here is an example scenario that contains saved views for three domains: Air, Land, and Sea.
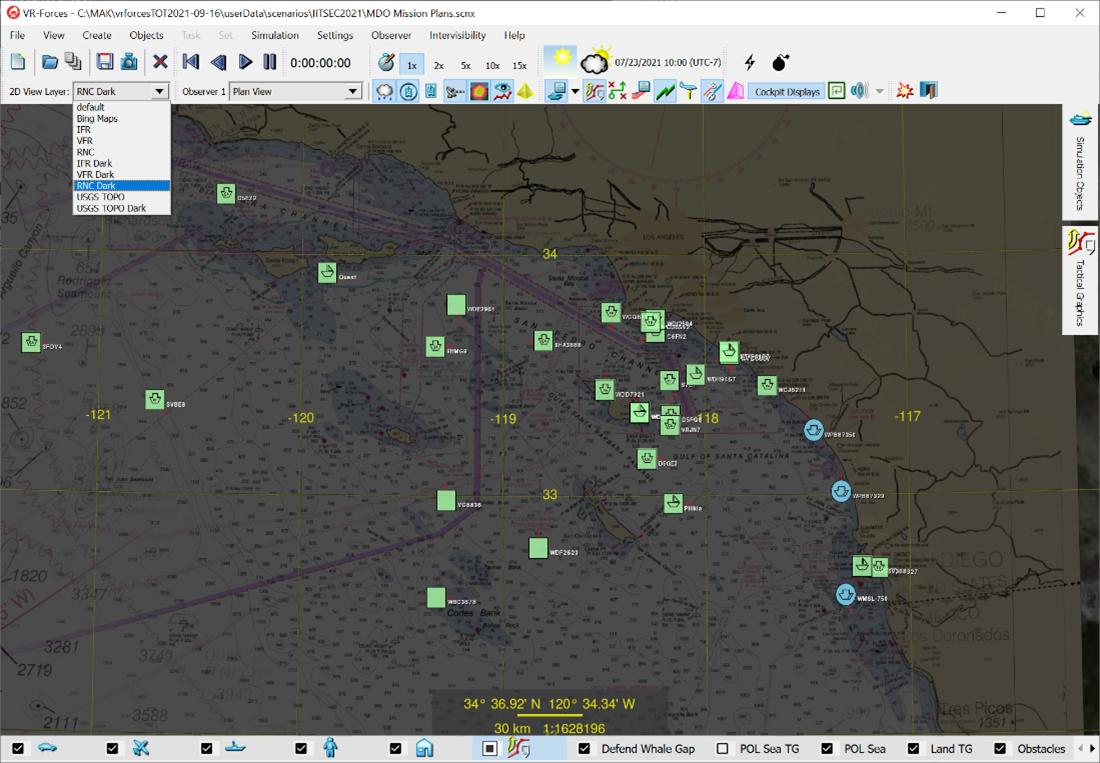
One saved view uses a "2D Layer View" that specifies Nautical charts:
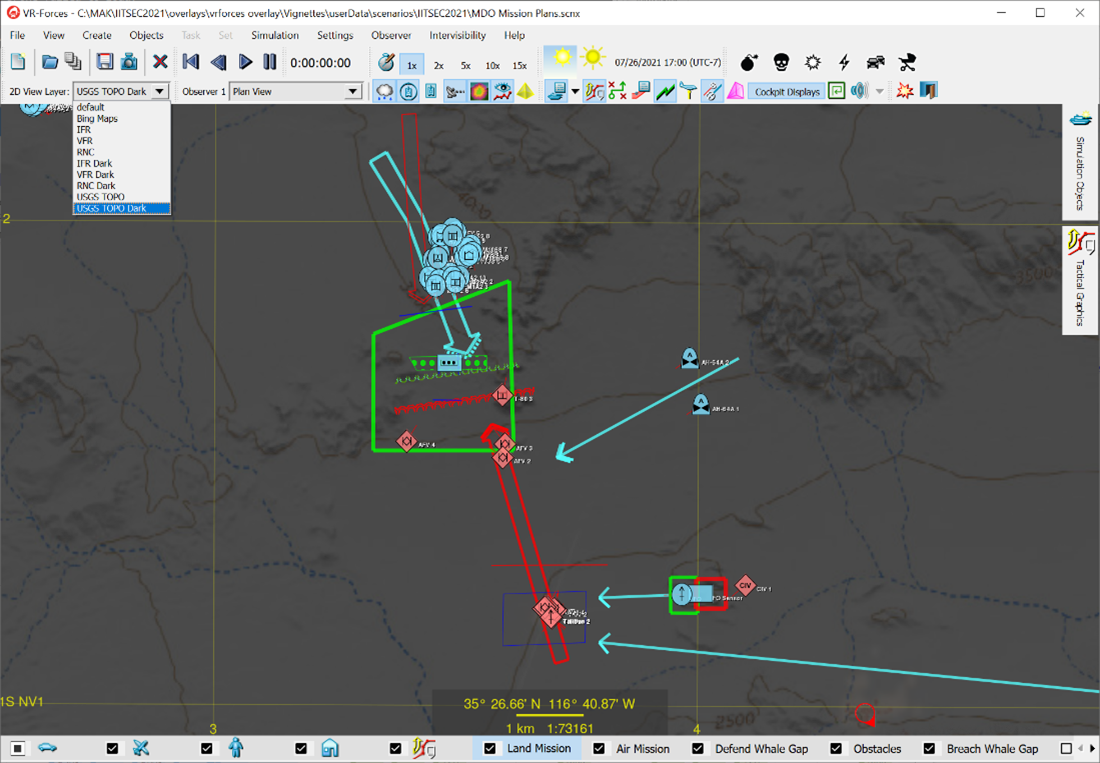
One saved view uses a "2D Layer View" that specifies USGS Topo maps:
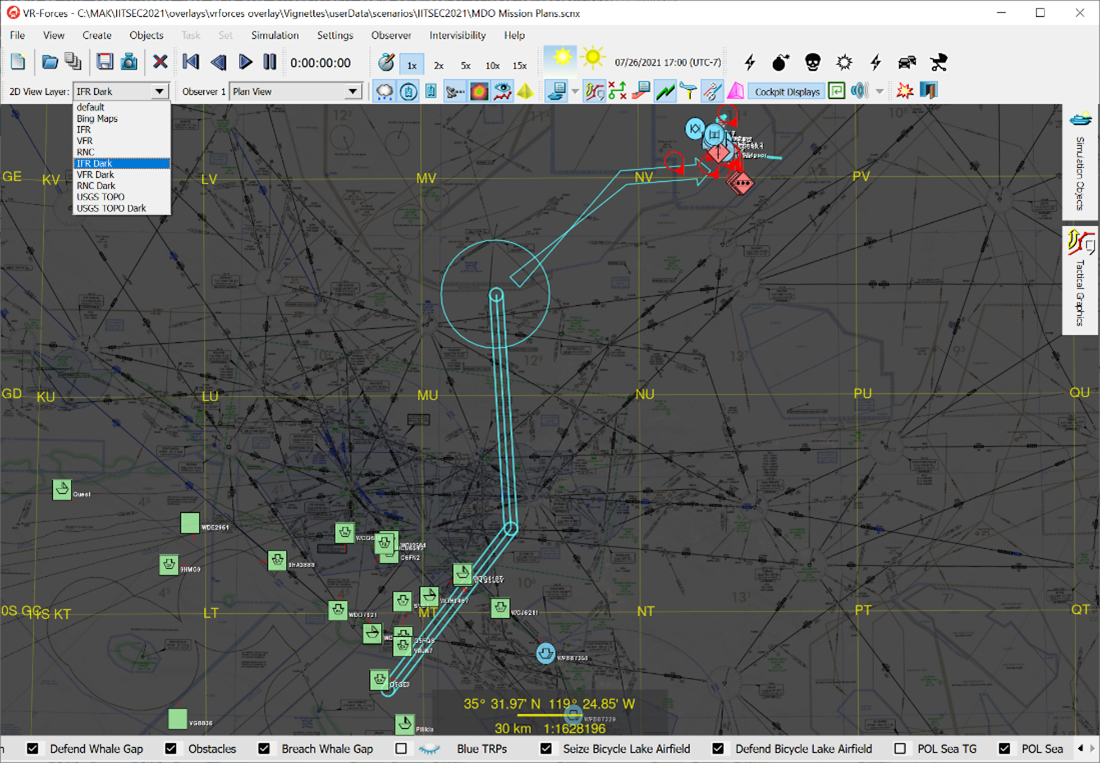
And a third saved view uses a "2D Layer View" that specifies air operations graphics:
Then when you switch back to a 3D "Stealth" view, you see the terrain draped with imagery, not maps:
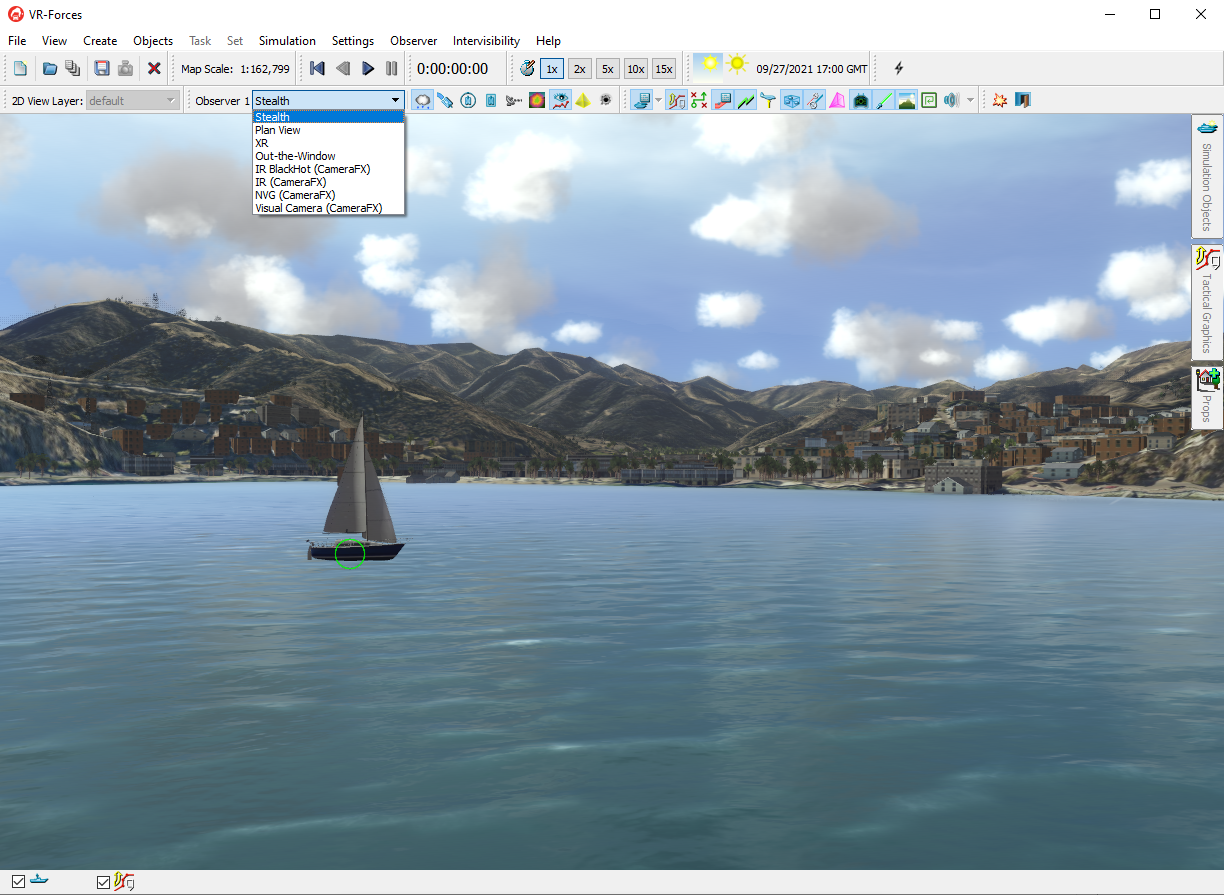
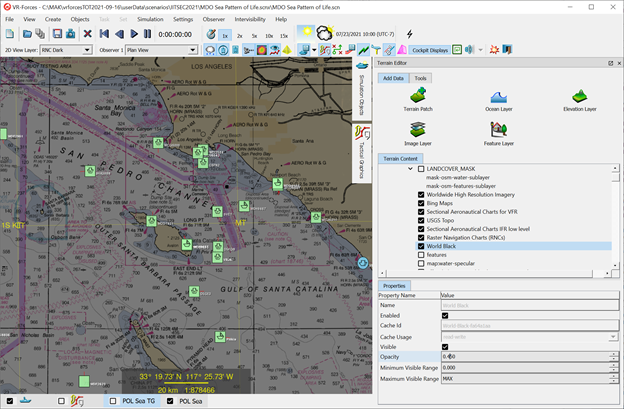
Did you notice that the maps look really dark? I choose that look. I find that raster map graphics make a distracting background for scenario planning. So I added a black image (called WorldBlack.tif) to my "MAK Earth (online).earth" file and used it at 65% opacity to darken the raster maps so that the entity and tactical graphics would pop.
Here are the edits I made:
I added WorldBlack.tif to the \data\Terrain\World\Imagery folder. You can download WorldBlack here: https://mak.com/ftpout/WorldBlack.tif
In the MAK Earth (online).earth file, I added a reference to the WorldBlack image:
<GDALImage name="World Black" lod_blending="true" opacity="0.65">
<mapgroup>RNC Dark,IFR Dark,VFR Dark,USGS TOPO Dark</mapgroup>
<url>../../data/Terrain/World/Imagery/WorldBlack.tif</url>
</GDALImage>
Notice the <mapgroup> clause. By adding this to one or more of the Image layers defined in your .earth file, you define "2D View Layers" that will show up in the GUI.
I added "RNC Dark", for example, to the <mapgroup> of these images:
<BingImage name="Bing Maps">
<TMSImage name="Raster Navigation Charts (RNCs)" lod_blending="false">
<GDALImage name="World Black" lod_blending="true" opacity="0.65">
This created a new 2D View Layer that covers the world with Bing maps. Wherever I have navigation charts, then, those cover the Bing maps and the whole world is covered with the black image at 65% opacity.
And here's a bonus tip! You can use the Terrain Editor panel, select the World Black image that you added to your .earth file, then you can interactively choose the level of opacity that suits your fancy.
I hope this helps you see more possibilities for how you can manage your VR-Forces scenarios.